4 Easy Steps
1. Log in to GoDaddy
2. Edit the current A record
3. Optional: Configure CNAME record for www
4. Double-check your work
Note: DNS propagation times
Note: Custom nameservers
Log in to GoDaddy
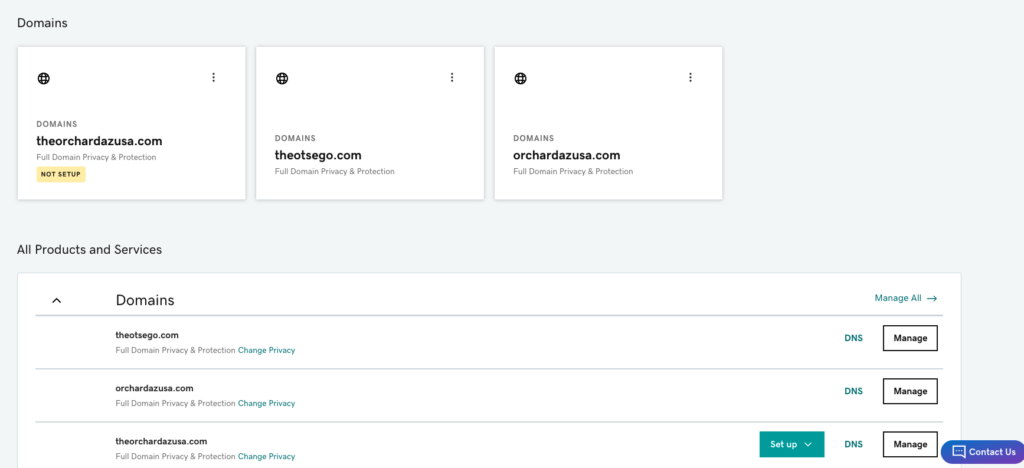
Step 1: In a separate tab, log in to the GoDaddy administration panel
Step 2: On the My Products page, locate the domain you want to point to WPEngine.

Step 3: Click the DNS button.

Edit the current A record
There’s a good chance you’ll see several records on the DNS page, especially if your domain was pointed to a different host previously. For now, we’re just going to be concerned with the A record, since it’s the record responsible for pointing your domain to your website.
Be careful about modifying or deleting any other records – especially MX records, which are responsible for email. Also, it never hurts to take a screenshot before you start making changes.
Step 1: Locate the A Record.
Step 2: Edit the A Record by clicking the pencil icon.

Step 3: Set Host to @
Note: The @ symbol serves as a placeholder for the root level domain.
Step 4: Enter your IP address under Points To.
Step 5: Usually, there’s no need to adjust TTL, which stands for Time To Live.
Step 6: Click Save to apply the changes.
Unless you have a subdomain setup, for example, shop.thisfinedomain.com, you should only need one A record value. At the very least, make sure that you have one A record with @ set as the host which is pointing to your WPEngine IP address.
Optional: Configure CNAME record for www
We recommend you also set a CNAME record in your zone file to allow use of the www prefix. A CNAME (aka canonical name) points a subdomain to another domain name.
For example, with a CNAME in place, visitors entering www.thisfinedomain.com in their browser will be re-routed to thisfinedomain.com. Without a CNAME record, visitors will instead reach an error page.
Step 1: Click Add under the Records table.
Step 2: Under Type, select CNAME.
Step 3: Enter www under Host.
Step 4: Enter @ under Points to.
Step 5: Click Save to apply the changes.
Double-check your work
Step 1: Check GoDaddy’s DNS Management page to make sure the record changes have been updated. Your records should look like this (with your domain’s information instead of the example domain here)

Notes
DNS propagation times: DNS by nature can take 24-48 hours to fully propagate across the entire internet, though it’s generally much quicker. By default, GoDaddy sets the Time to Live (TTL) setting for each record to 1 hour, so you should see your changes go live within that timeframe.
Custom nameservers: If you’ve made changes to your DNS records but nothing seems to be happening, your domain may be using custom name servers instead of GoDaddy’s defaults. This means that GoDaddy’s DNS settings will not have any effect. In this case, you will need to adjust your DNS settings at the name server’s admin panel instead. This situation is most likely when a proxy like Cloudflare or Sucuri is being used.


